Are you interested in looking for better ways to make your website more visible to potential web visitors? Well, there are several things you...
Are you looking to build an online store with WordPress in less than 1 Hour?
If yes, then you have landed on the right web page. Starting any kind of website or store using WordPress is like you’re creating a PowerPoint presentation.
There are lots of platforms you can use to build an online store, but I am going to use WordPress in this post.
There are lots of WordPress plugins that can create anything possible in WordPress.
So, In this article, you will learn how you can create an online store with WordPress as well as:
At the end of this post, you will all be set to open your start and ready to get your first order.
Without further ado, let’s get started!
Table of Contents
The first thing is what you decided to sell. Do you already have your store or are you going to open a store?
You must have to pick your niche first.
If you don’t decide yet, you can use these tools to get the best niche for your online store:
Go to the above tools by Google and enter the product you are interested in to get the best niche ideas for your business.
If you are going to start an online store, you need some basic things to get ahead. You have to spend some money on these basic requirements.
Without these basic things, you can’t start your online store or eCommerce website. These mandatory things are:
Picking a name for your online store is perhaps the most enjoyable element of the entire launch process while you’re finding out how to build an online store with WordPress.
This is the name of your website. It is the URL that visitors enter into their browser to go to your website. It will be used by your customers to access your store, see items, place orders, and make payments.
Now that you’ve determined what you want to sell and the niche in which you want to operate, you can utilize the keyword or phrase linked with the niche as the seed for creating your perfect business name.
Now the next part is to purchase hosting. Most of the hosting plans give you a free domain when you purchase their web hosting plan.
I recommend Bluehost for your eCommerce store.
Bluehost offers affordable eCommerce hosting plans, which include a free domain name for one year, Free SSL, and lots of other stuff.
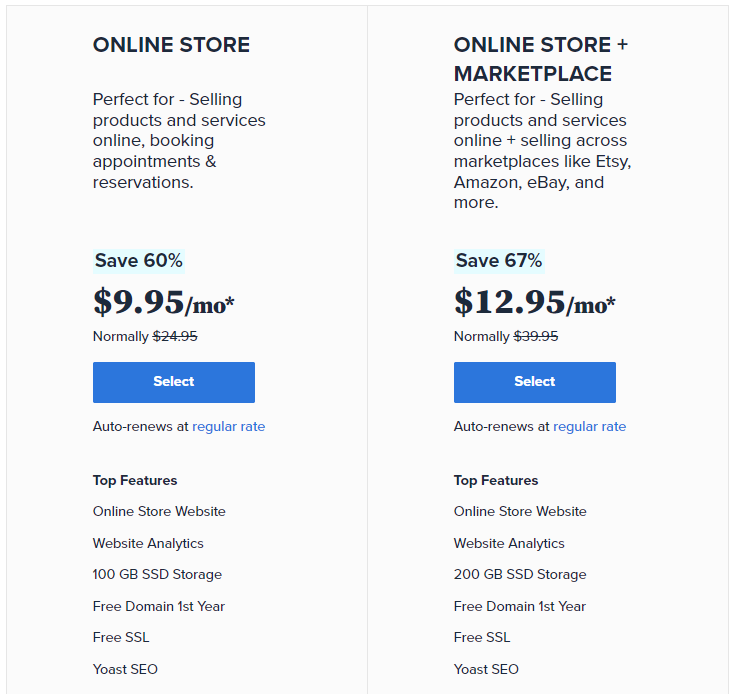
So, click here to land on the official website of Bluehost and purchase your plan. You can read this guide to know which Bluehost plan is best.
The next step is to install WordPress on your website. WordPress is the largest content management system (CMS) in the world powering more than 30% of the world’s websites.
I also recommend you use WordPress and wooCommerce to build your store as it is too easy and affordable.
Some essential plugins like WordPress & woo-commerce are already installed If you purchase the eCommerce plan of Bluehost.
Another important thing you need to use after this step is to install the fastest WordPress theme for your store.
There are lots of other WordPress themes in the market but I recommend you to use Astra WordPress Theme.
Astra is the fastest most growing WordPress theme in the market with all wooCommerce features available.
You will get pre-built wooCommerce templates that you can import into your website. These templates are amazing and easy to import.
There are several plugins available that can add e-commerce functionality to your WordPress site. None of them can compete with WooCommerce on a level playing field.
For good reason, this free WordPress plugin is the most popular option for online retailers on the platform. WooCommerce, like WordPress, is simple to set up and infinitely customizable.
WooCommerce works effectively for selling both physical and digital things. WooCommerce has you covered whether you’re creating a modest business to sell a few downloads or trying to move hundreds of goods each day.
If you have not installed WordPress on your hosting yet then you should install it first. As I mentioned above, Bluehost gives WordPress and wooCommerce pre-installed with their wooCommerce hosting plans.
If you purchased another plan of Bluehost and wanted to install WordPress on your hosting account, then you can click on this link.
There are several WooCommerce themes available for WordPress, both free and premium. The Astra WooCommerce theme stands out.

Because of the excellent customer support, the theme has over 1 million downloads and a consistently 5-star rating. What makes this theme unique is how well it works with page builders.
Because your Bluehost hosting account installs the Storefront theme for your website by default, you must change it to the Astra theme.
Go to Appearance > Themes > Add New and type Astra on the search box.

Install and activate the Astra WordPress theme.
If you wish to import a design into your website, you must first install the Astra Starter Sites WordPress plugin.
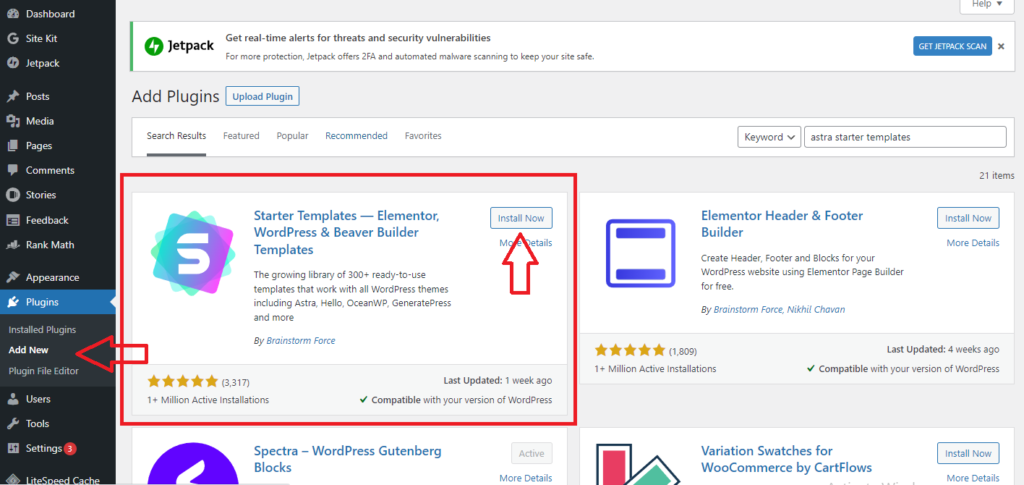
After installing this plugin, you will be able to import Astra templates to your website.
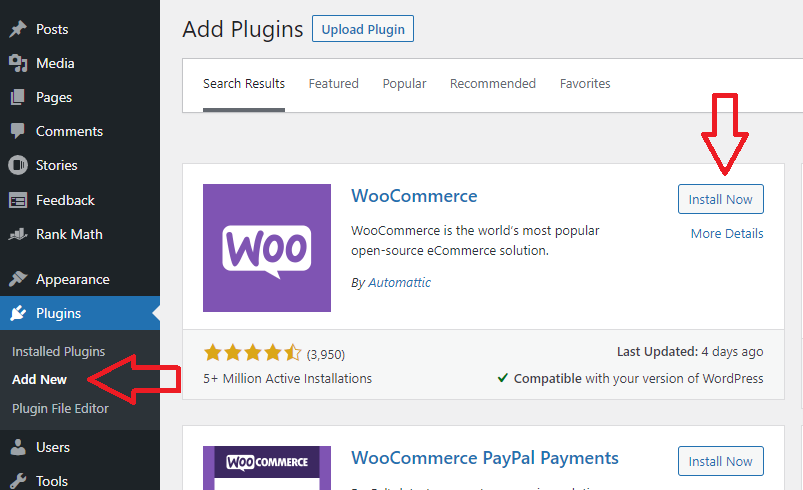
Then Install the wooCommerce plugin to enable the eCommerce functionality in your WordPress store.
To Install & activate it, type wooCommerce in the search box after navigating Plugin > Add New Plugin
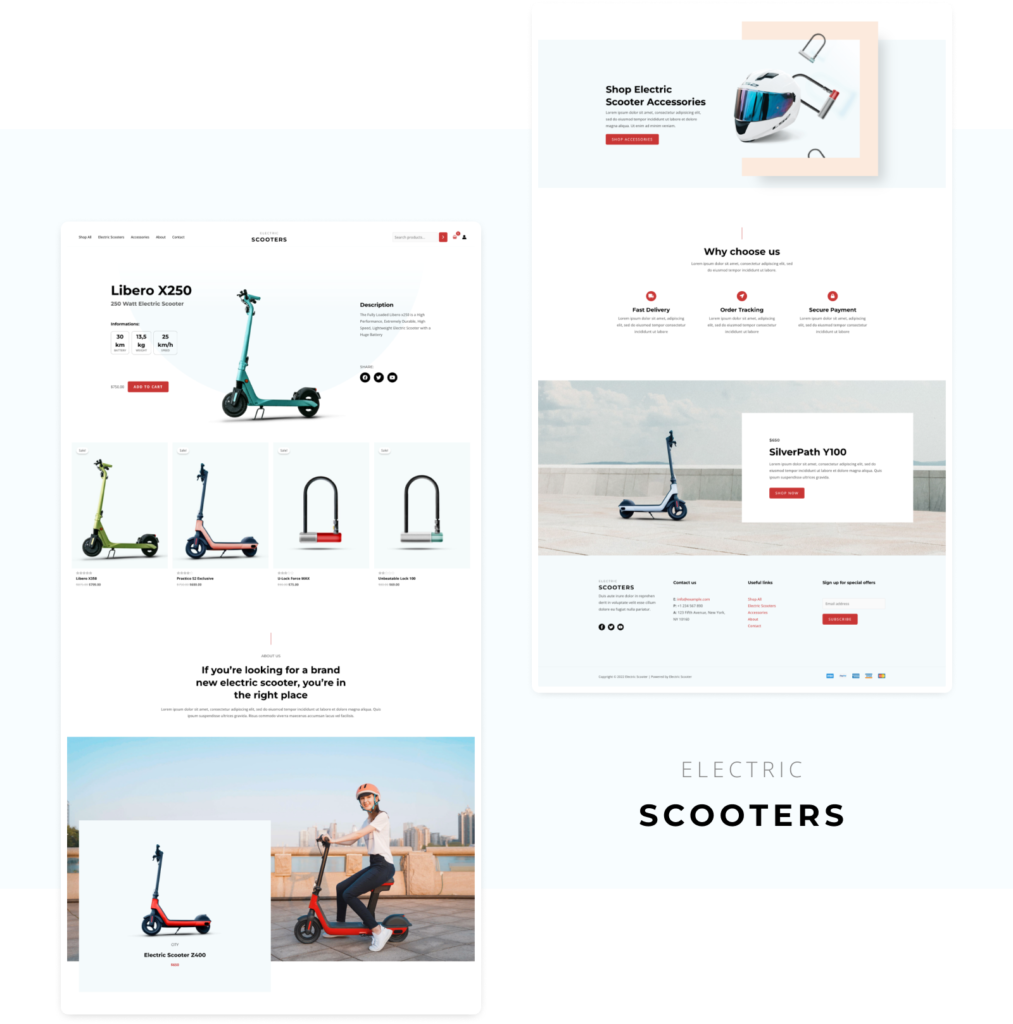
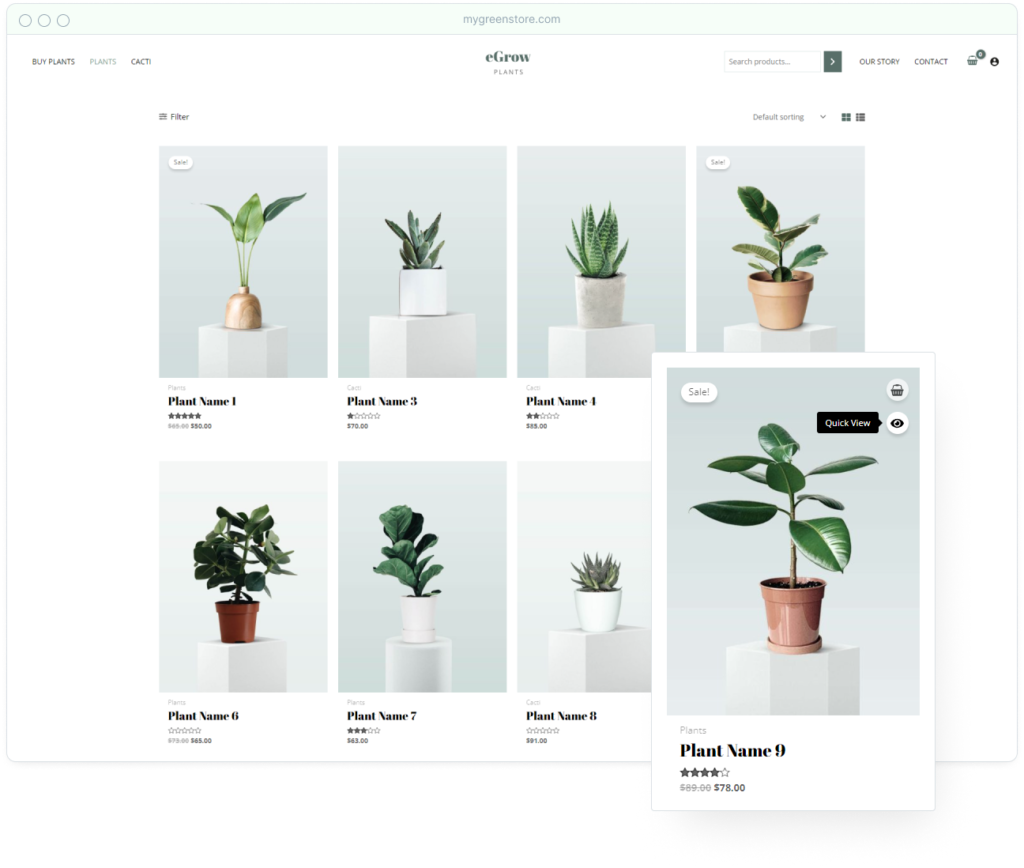
Now everything is Installed on your website. Let’s choose the best template for your online store.
Here are the four best wooCommerce templates which you can use on your website.


To begin selling your items, you will need to set up a few things such as payments, currencies, and shipping information.
You only need to configure a few settings once Bluehost has already installed WordPress and WooCommerce.
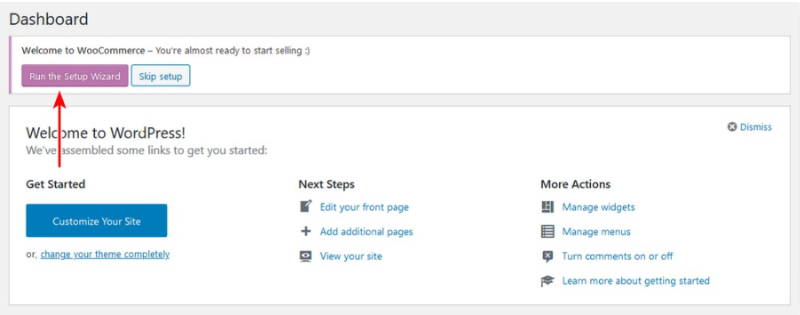
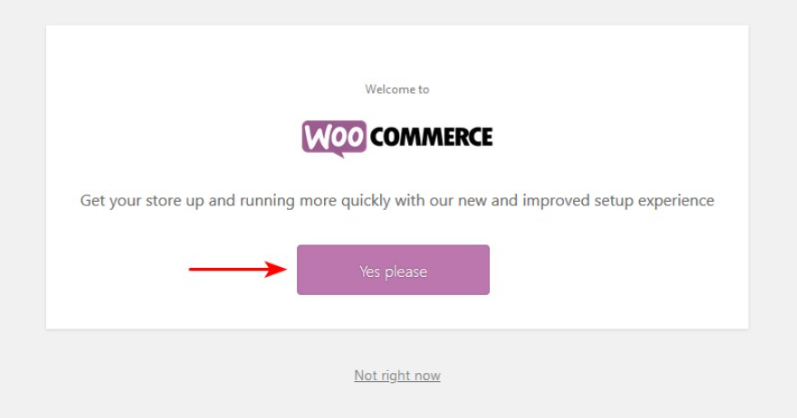
A ‘Welcome to WooCommerce‘ notification will appear on the Dashboard page. This notice shows on your WordPress administration pages.
Setup must be started by clicking the ‘Run setup wizard‘ button in the notification.
When you click that button, the WooCommerce setup wizard will open. To begin, you must first click the ‘Yes Please‘ option.
When you click the continue button, you will be sent to the next stage. In this step, you must input the address of your WooCommerce store.
Click on Continue for the next step.
The following step requires you to input shipping and tax information. You can, however, amend the shipment and tax details later if necessary.
After completing this step, click on the continue button to the next step.
You must now select a payment option for your online store.
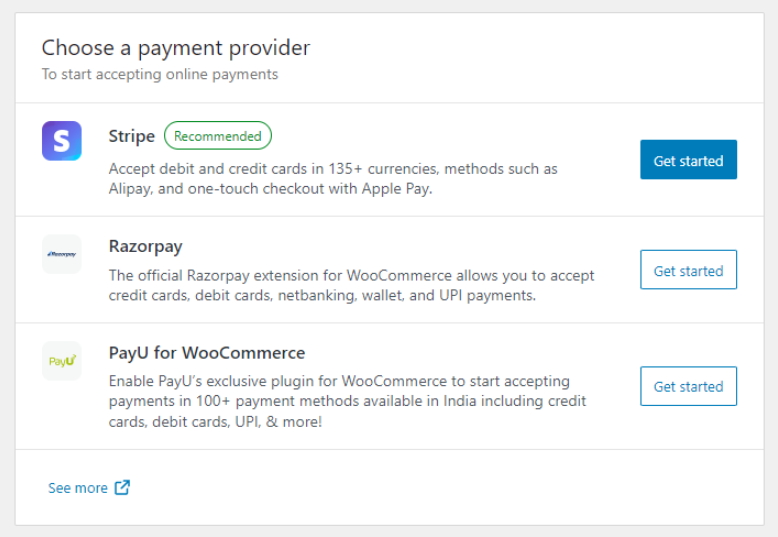
WooCommerce, by default, supports Stripe payment gateways. Many different payment options are available for WooCommerce through third-party plugins. If you require them later, you can install them.
PayPal Standard is the most common and hassle-free method of accepting money. Enter your PayPal email address and click the setup button to activate it.
You may also choose Stripe, but you must let your consumers submit their credit card information on the checkout page rather than leaving your site and going to PayPal.
The next step is to add your product to your website. It is also very simple like other steps.
Click on Product > Add New in the Dashboard area
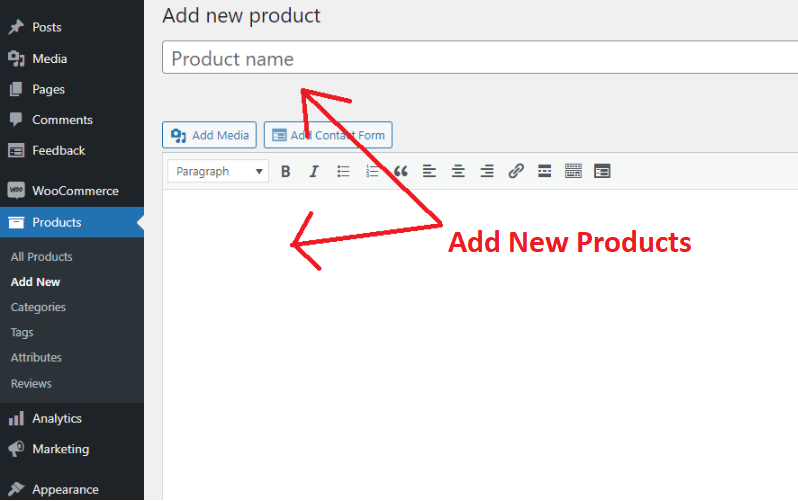
The WordPress editor has been updated with several new features. You must now set up everything related to the product.
Enter the title and description of your product and then add some organic keywords, meta description, images, and content.
You need to learn some on-page optimization tips which help you to get organic traffic from search engines.
Scroll down, and you will see a product type. The product type you choose is determined by what you are selling. WooCommerce allows you to select different product kinds by default.
Product types are:
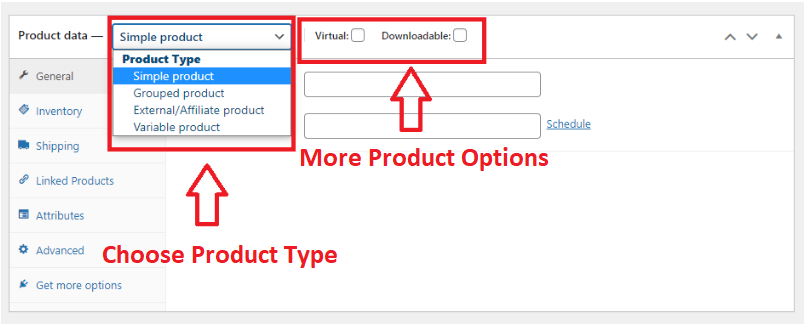
There are two more options.
So, these are the most important settings while adding products to your online store. There are a few more settings that you need to do before publishing your product.
After doing all these mandatory settings hit the publish button.
This is the last step you definitely need to do for your first sale. Promoting your online store using different tactics helps you to grow your store and increase your revenue.
There are several ways to promote an online store and I am going to mention some effective ways that work in less time.
These steps are:
Optimize your e-commerce website with Search Engine Optimization (SEO). This strategy facilitates the visibility of your website by search engines such as Google and Bing.
Consider your target market from their perspective. How do they inquire about your items and what do they want to know?
Take note of the on-page content. On-page content includes product titles and descriptions, images, any blogs or other material you may have, and so on.
If you are good at writing then content marketing should be a good choice to promote your eCommerce store.
Create and manage a blog about your e-commerce website. For example, if you sell DVDs on your website, publish blog posts on new movie releases.
Connect the blog with the e-commerce website. If a reader likes your blog, he could go to your website.
Email marketing is a simple approach to reaching out to consumers with deals tailored to their individual requirements.
Customers are primarily concerned with how your product might help them, therefore discounts and offers that meet their needs are more likely to be accepted.
For example, store visitors who perused items but did not purchase might benefit from a first-time buyer email discount.
You can pay for different advertisers to promote your store on search engines. Google Ads can be the best choice for you.
These ads are displayed in search results. If someone clicks on the advertising, they will be sent to your website, and you will be charged a fee.
This sort of advertising is quite successful, but it is frequently very expensive.
Consistency is key in social media marketing; publishing often at times that correspond to your clients’ schedules helps you to contact and engage purchasers on a regular basis.
Be sure to use every social networking outlet. Instead, concentrate on the channels that their consumers really use. With data-driven solutions like Google Analytics, you can track which platforms their consumers prefer.
You should give Instagram priority if your target audience spends a lot of time there but not on Twitter.
This is how you can start your Online store with 7 simple steps. I’ve mentioned every detail you need to start an online store.
The one thing you need to succeed in online business is consistency.
Create an attractive online store by using the Astra WordPress theme which gives you soo many wooCommerce options.
Would you like to start an online store, or Do you have any? let me know in the comments section below.
AlsoRead:
Are you interested in looking for better ways to make your website more visible to potential web visitors? Well, there are several things you...

Upselling and cross-selling are sales techniques that help businesses get more sales day in and day out. Let’s help your online store apply the...