

If you’re planning on running or are currently running an educational website, then you should add an LMS or a learning management system plugin...
Looking to add tables to WordPress posts and pages. You can easily create tables in WordPress without using plugins in a couple of minutes.
As a beginner, you can simply insert tables in WordPress with any coding. In later days, you needed to use any plugin or HTML coding to create tables in WordPress, but now it is not the case.
This WordPress tutorial explains how to create tables in WordPress pages and posts.
Table of Contents
Tables are a great way of displaying the data in an understandable format. Especially if you have data on different products or sectors, making tables is a more effective way to showcase the information.
You can also use WordPress tables to create comparisons between different products. Generally, data-driven content with charts and tables is excellent and visually appealing to visitors.
It helps to reduce bounce rates and improve conversion rates. So, including different blog content formats will allow the user to engage more.
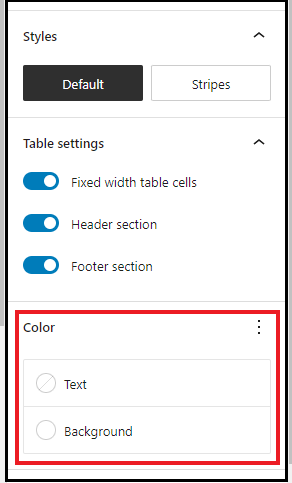
On WordPress, you can create and customize tables using different colors.
If you want to view how to create tables in WordPress posts and pages without plugin/HTML in a video watch it below.
To read as a blog then continue the reading.
There are some websites still suggesting the users to use HTML or plugins to create tables in WordPress. But we are here with simple steps to insert or add tables in WordPress without HTML.
WordPress is a highly customizable platform for creating and customizing website pages to every extent.
So follow the below steps to add tables to WordPress posts and pages.
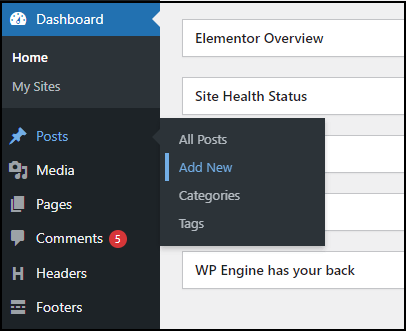
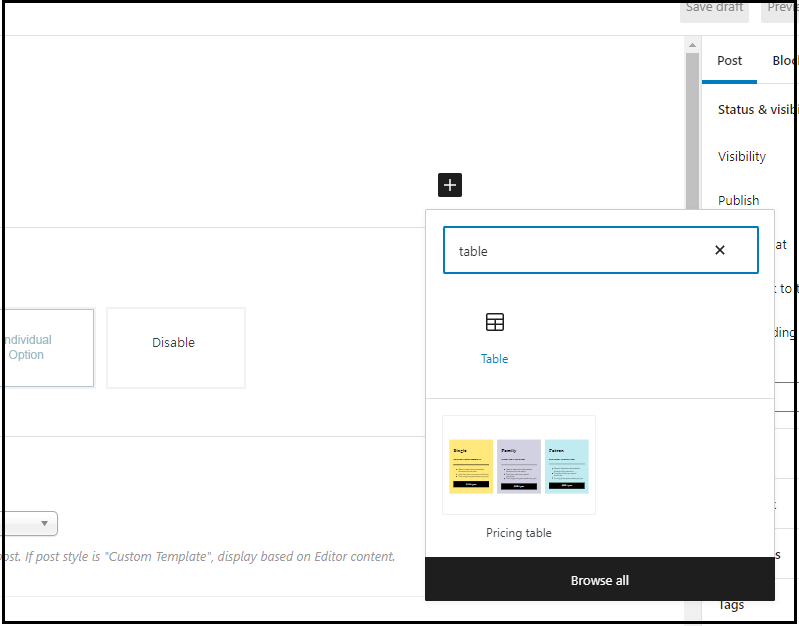
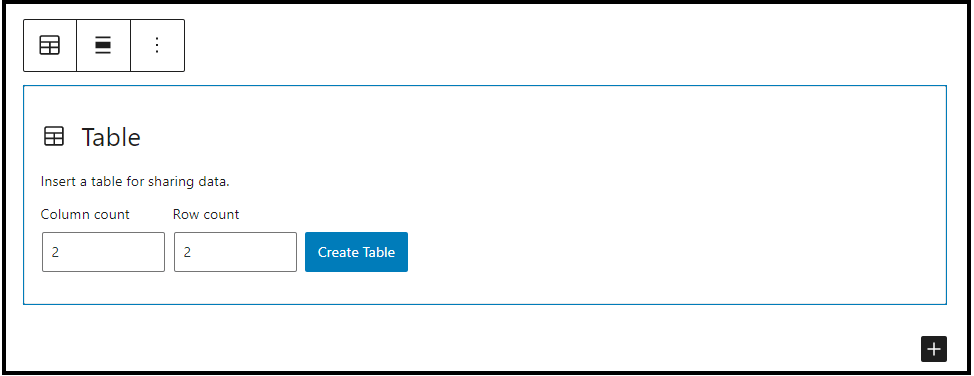

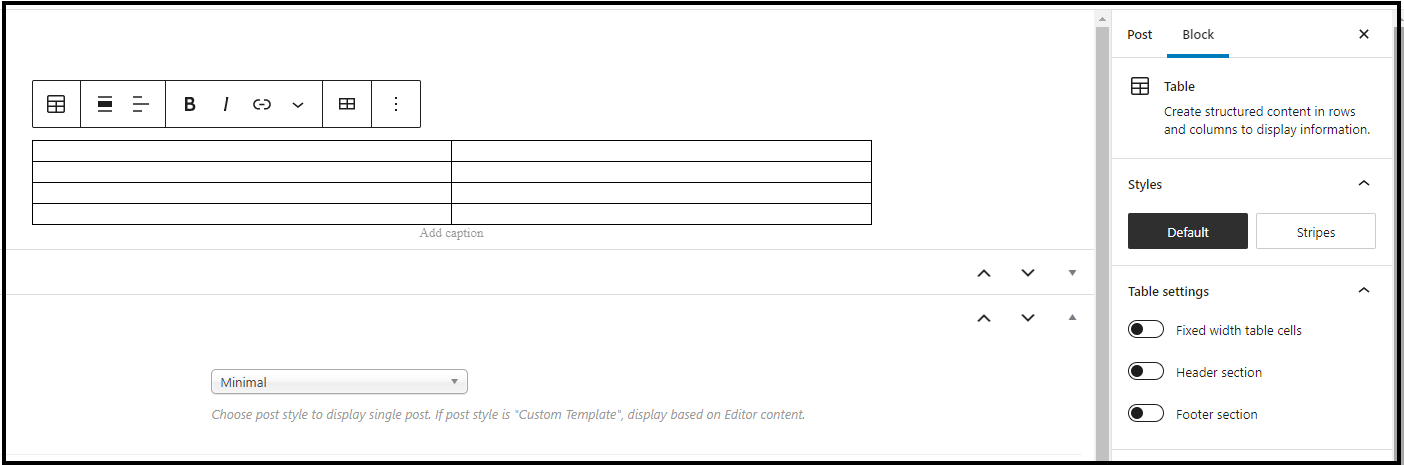
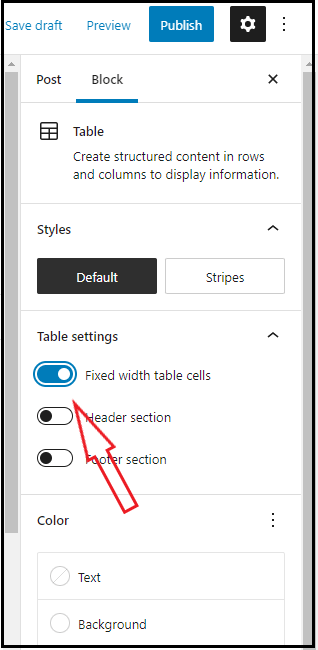
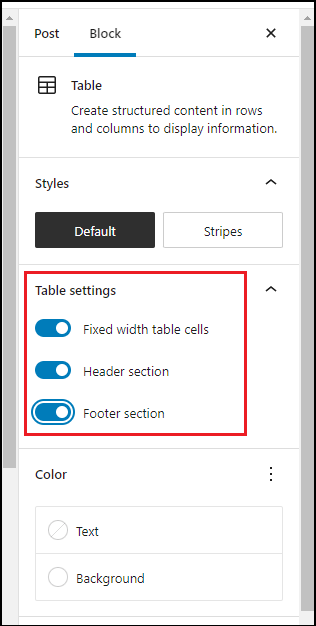
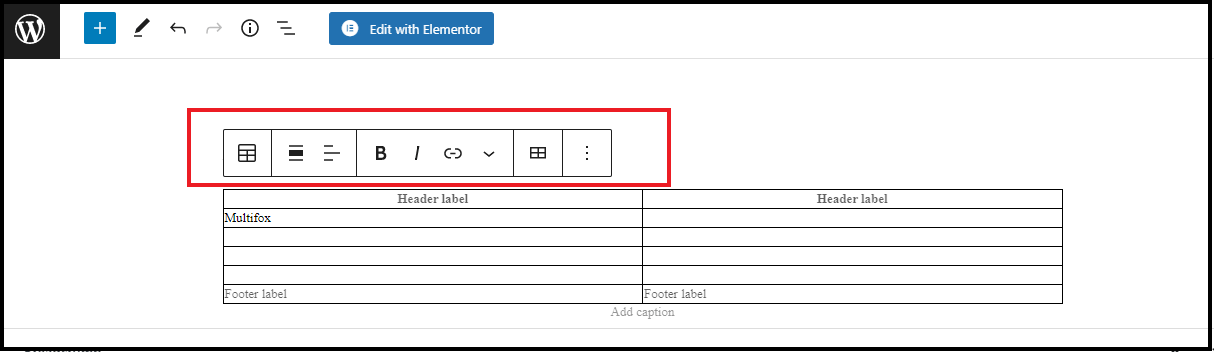
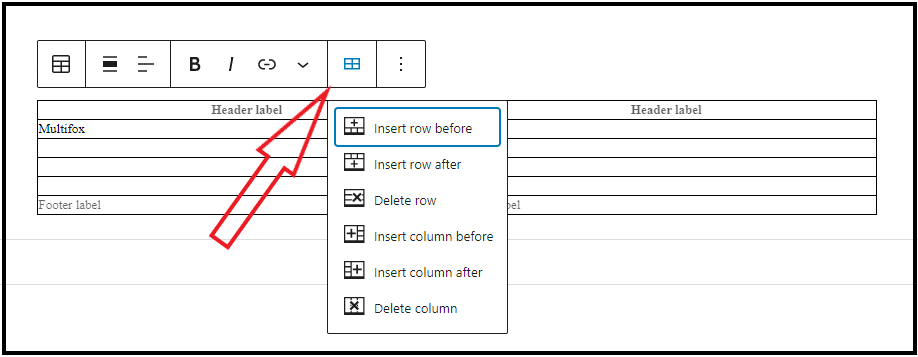
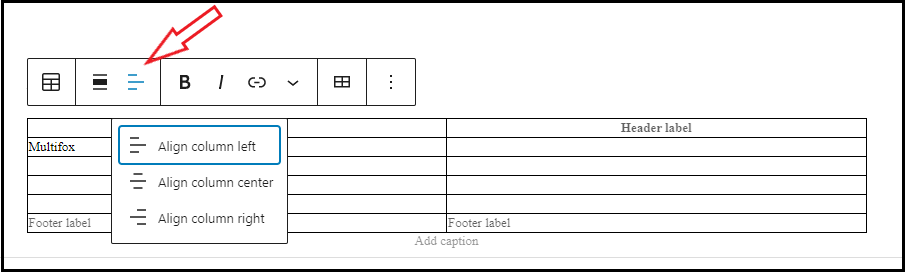
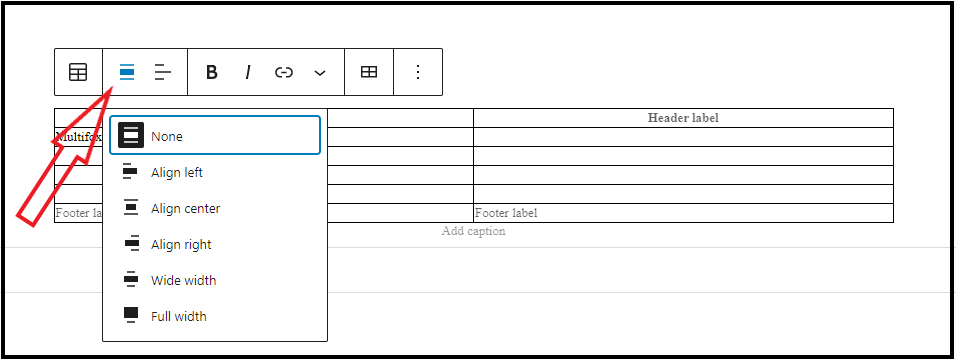
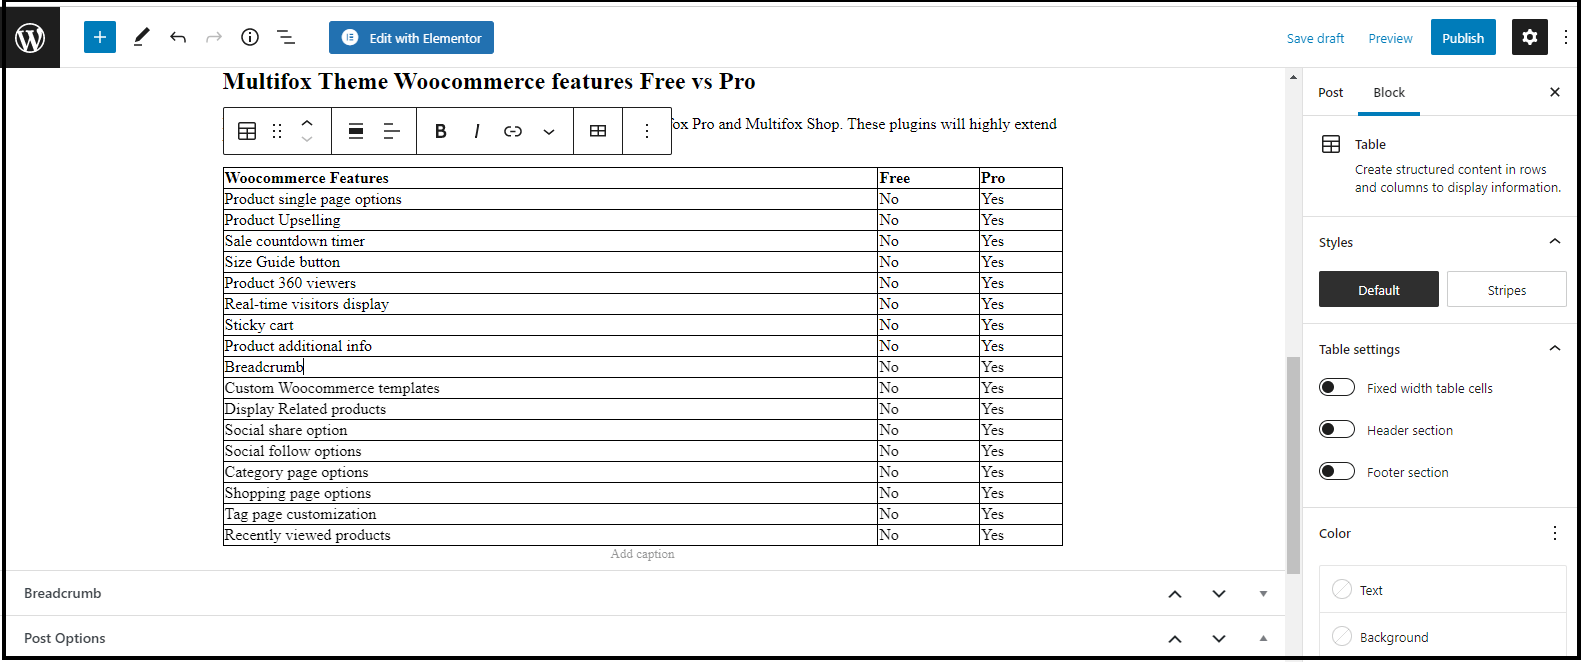
This is the simple method to create and add tables in WordPress from the Gutenberg block editor.
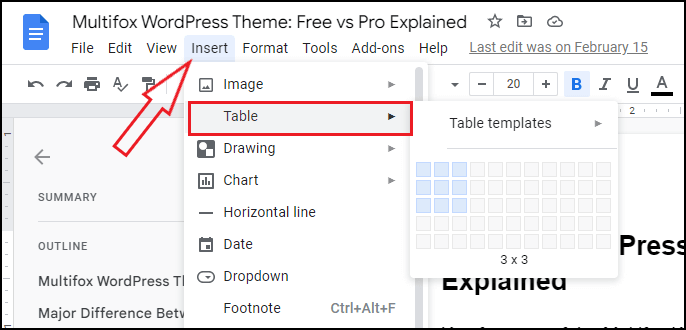
Another method to add tables in WordPress is by using Google Docs.
Follow the below simple steps to create and insert tables in WordPress.
These are the simple methods to Add and insert tables in WordPress without a plugin. But if you need more flexibility in creating and customizing tables, then using plugins is the best option to create tables in WordPress.
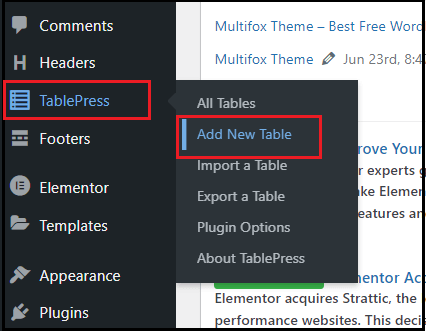
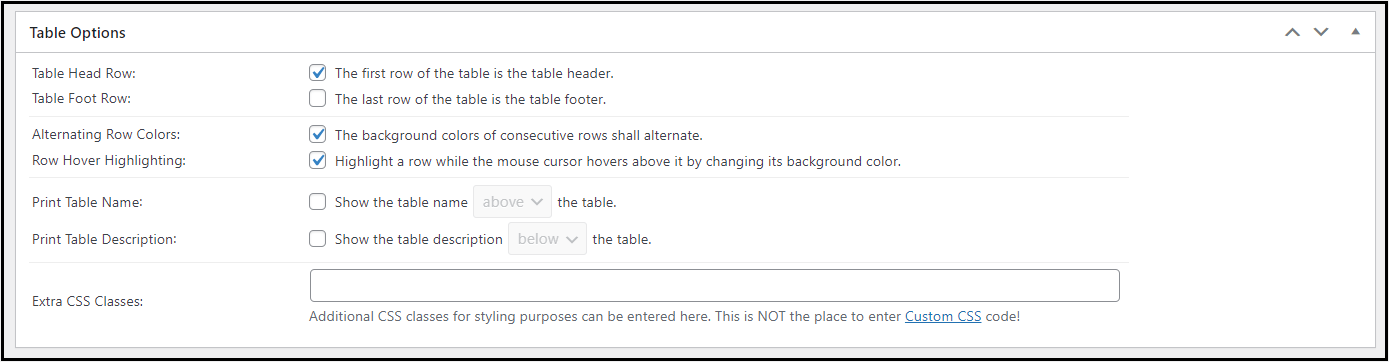
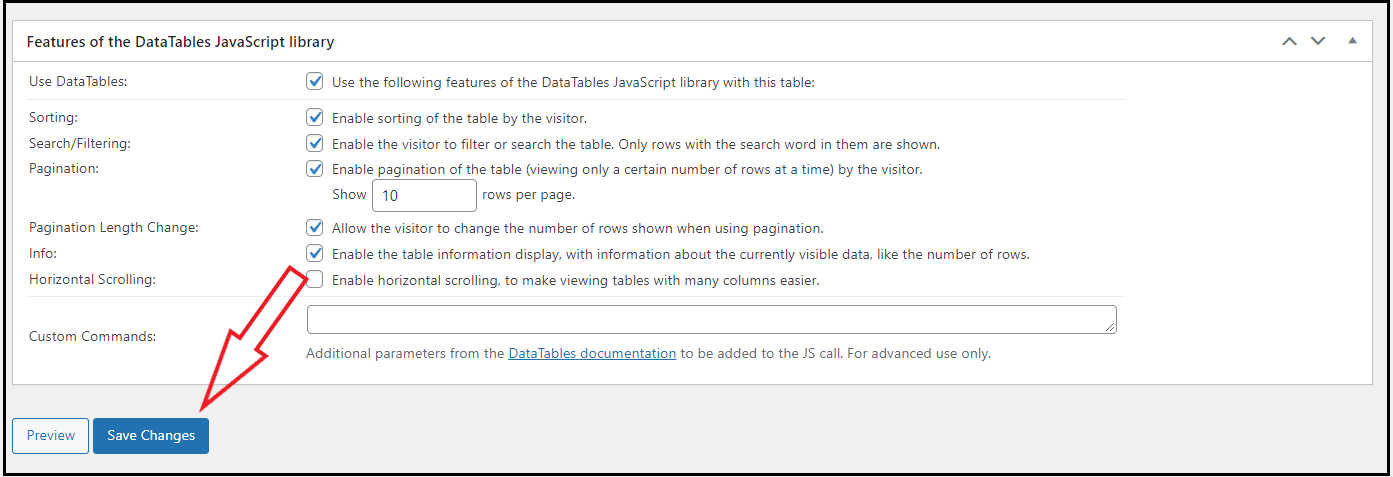
Using a plugin is the best option if you need more customization to the WordPress Tables. Specifically, if you are using WordPress classic editor, then you need a plugin to add tables in WordPress.
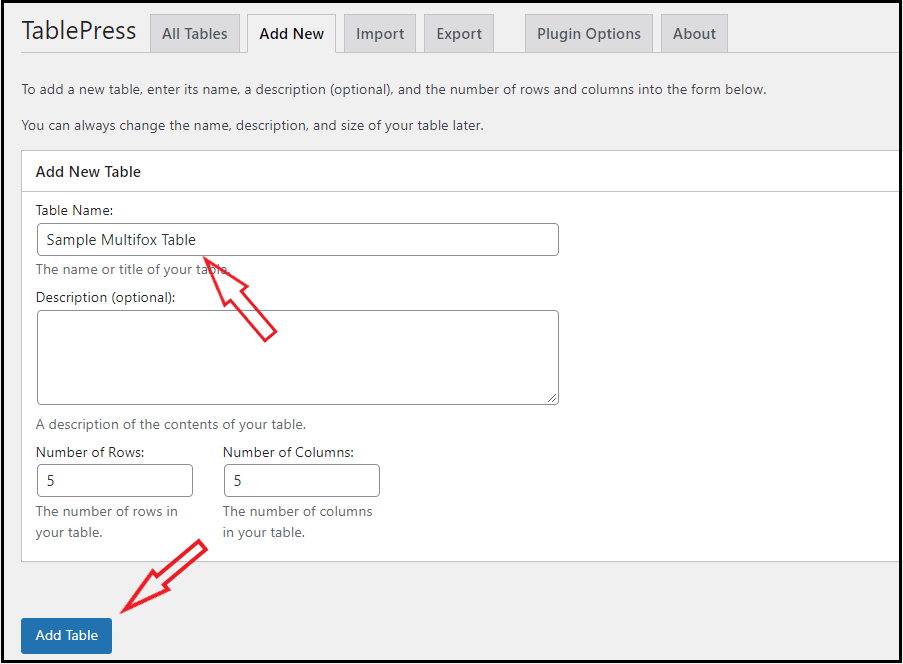
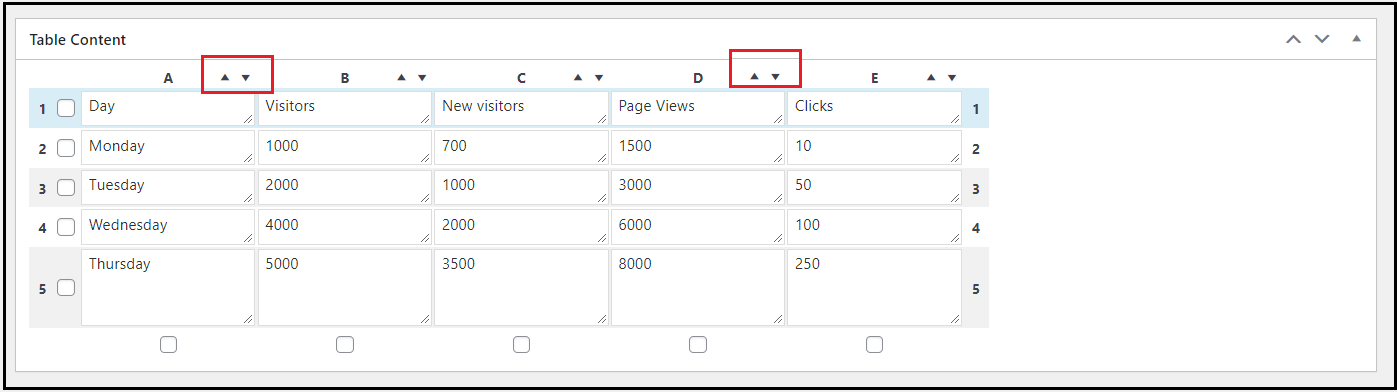
Here we are using the TablePress plugin to insert tables in WordPress.
TablePress is an open-source and free plugin with over 800k users. You can also check out how to install the plugin.
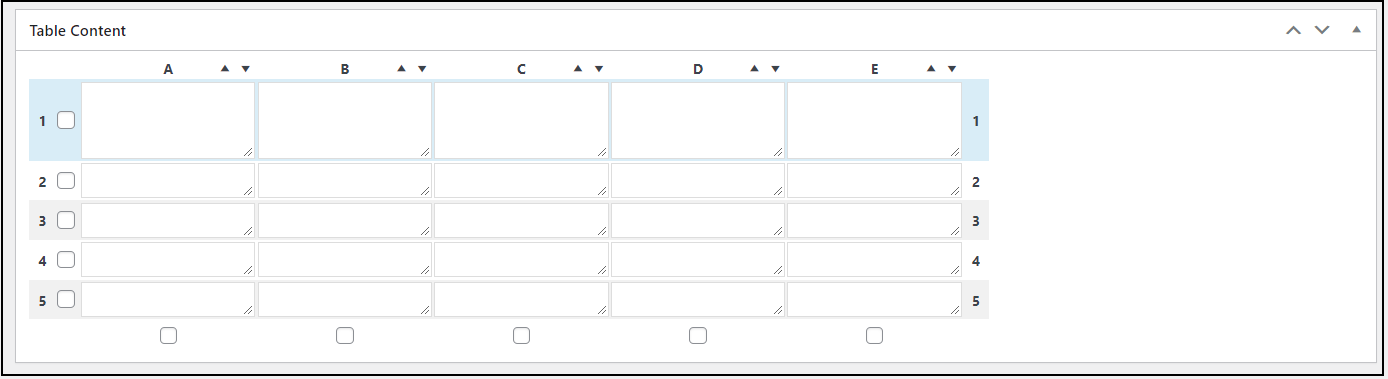

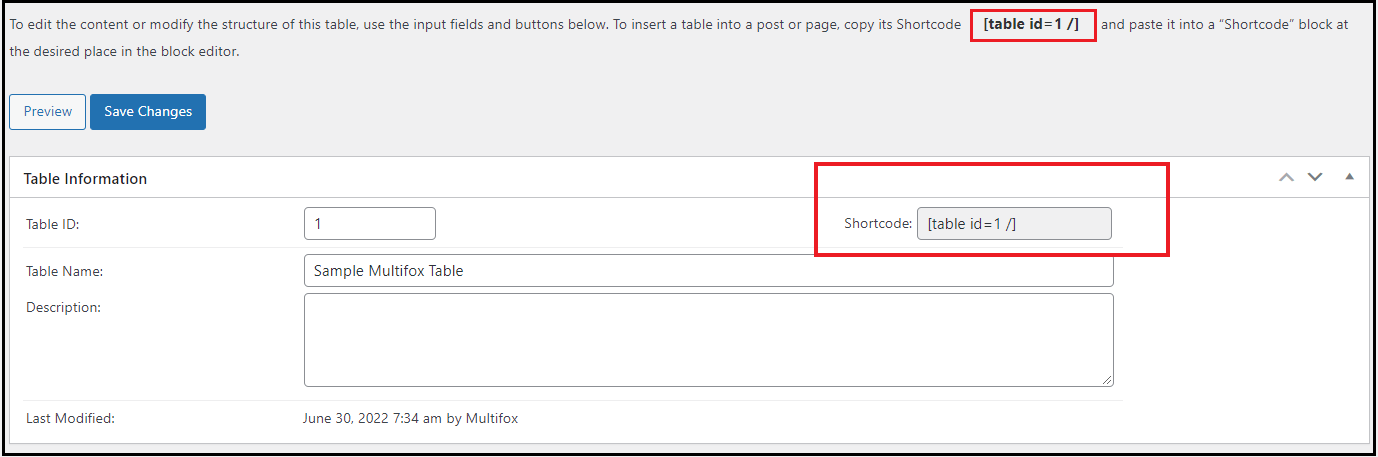
You can also place the Shortcode on the Paragraph block or Shortcode block in the Block editor
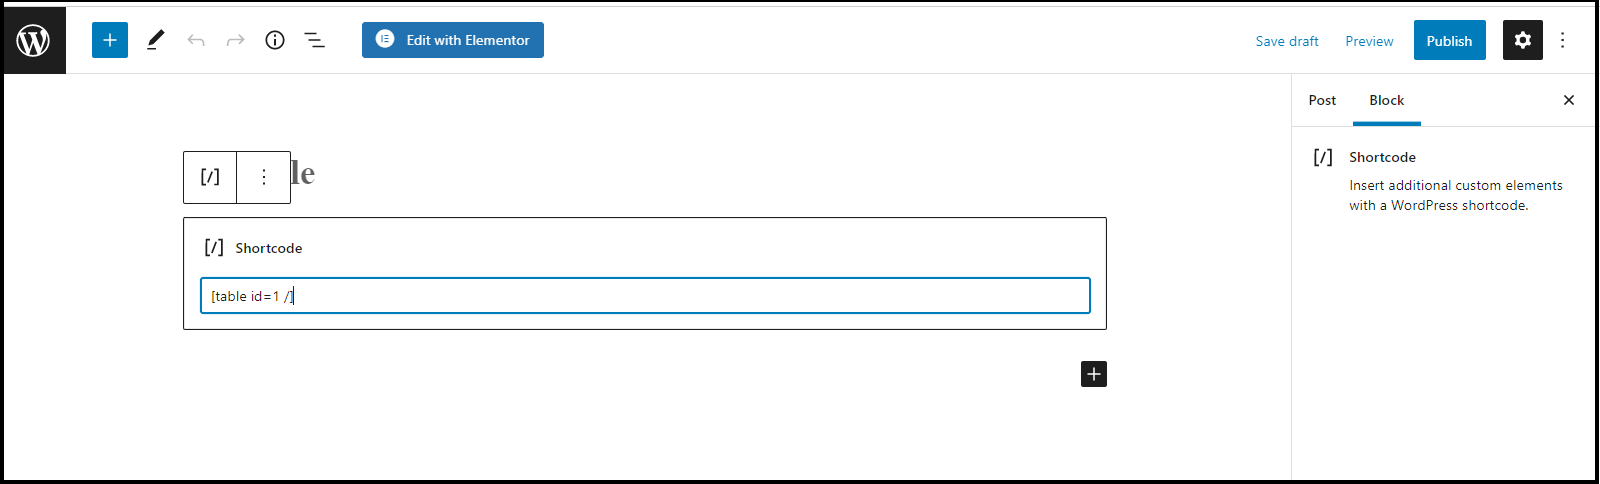
This is the quickest way to create and insert tables in WordPress pages and posts using plugins. You can add as many WordPress tables, and a unique shortcode is created for each table.
Using these methods, you can create and insert tables in WordPress pages and posts with/without using plugins.
If you are creating a general table, then using the table block from the block editor is enough.
Also learn how to create websites like flipkart and create custom sidebar in WordPress. Are you confused about finding what WordPress theme a website is using, here is our free WordPress theme detector tool.
We hope this article helps you to learn about how to create tables in WordPress. For more tutorials, visit our blog. If you have questions, do leave a comment in the comments section, and our WordPress experts will reply to you.
If you’re planning on running or are currently running an educational website, then you should add an LMS or a learning management system plugin...

SEO content is defined as the type of content that is written in accordance with various guidelines in order to play a role in...