E-Commerce Themes Let us imagine our online stores like the colorful islands in the vast sea of the internet. The PrestaShop labels act like...
With better digital advancements, now everyone can start their own online business and store in a few minutes. For creating your online store, you don’t need any technical or coding knowledge.
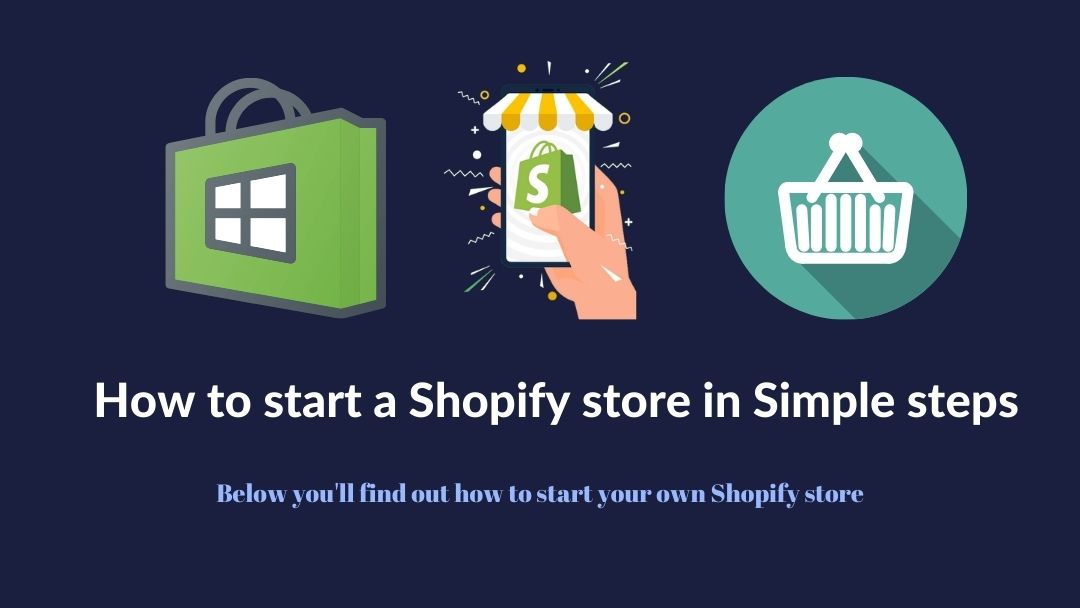
Shopify is the best platform to start your online store, and it is included with all the essential tools to establish a successful online business. Following some easy step-by-step processes, every beginner can launch their eCommerce store with Shopify.
Shopify made creating an online store more effortless, and you can start your unique store with these easy steps. Selling physical products has never been easier than this.
Table of Contents
It is the first step in setting up your dream eCommerce store. Shopify is generally a premium platform for setting up your online store. But it gives a 14 day free trial for new users to set up and configure their website for free.
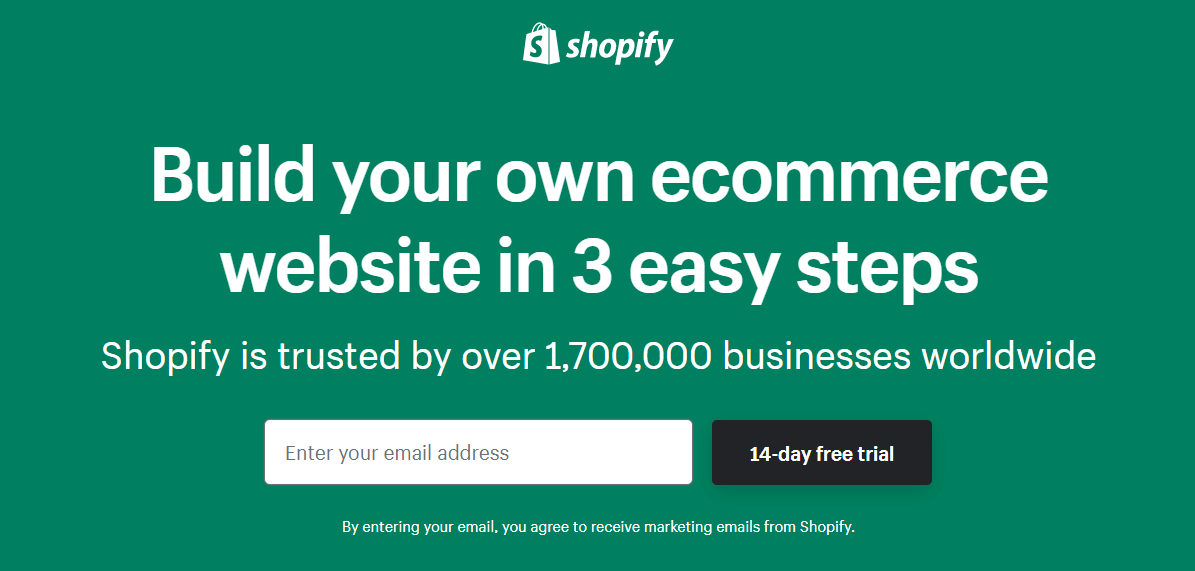
Visit the Shopify website, and on the homepage, you will see a signup area. You can now sign up by entering your email address and clicking the 14-day free trial button.
Next, you will be shown a small form to enter your next set of Account details. It asks for your password and Store name.
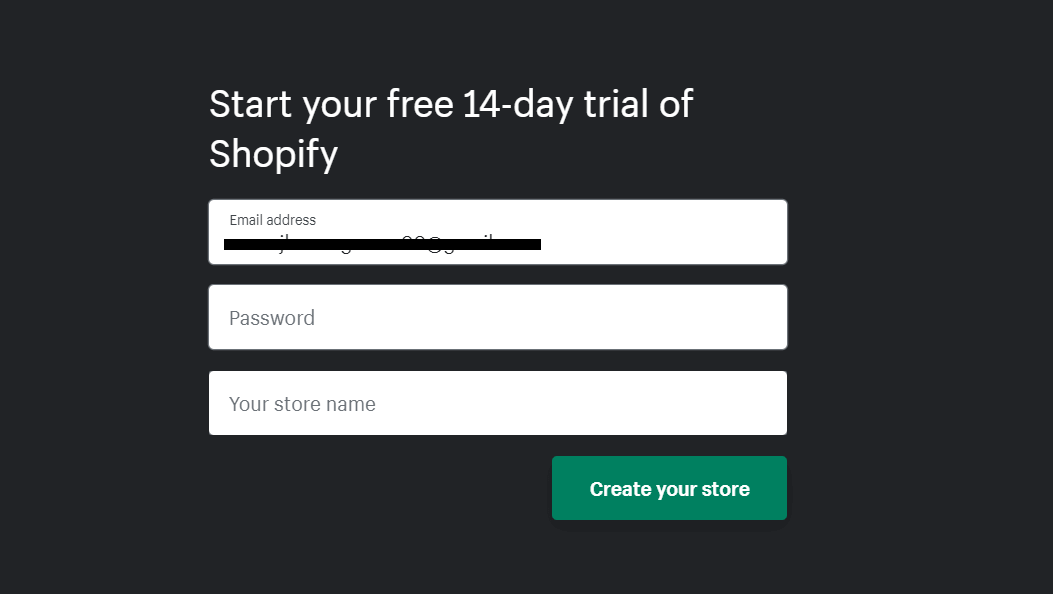
Here the store name is one of the important things to enter. The store name is the identity of your website that reflects your brand. Shopify only allows you to create your store if it is unique. So make it memorable, creative, and easy to pronounce.
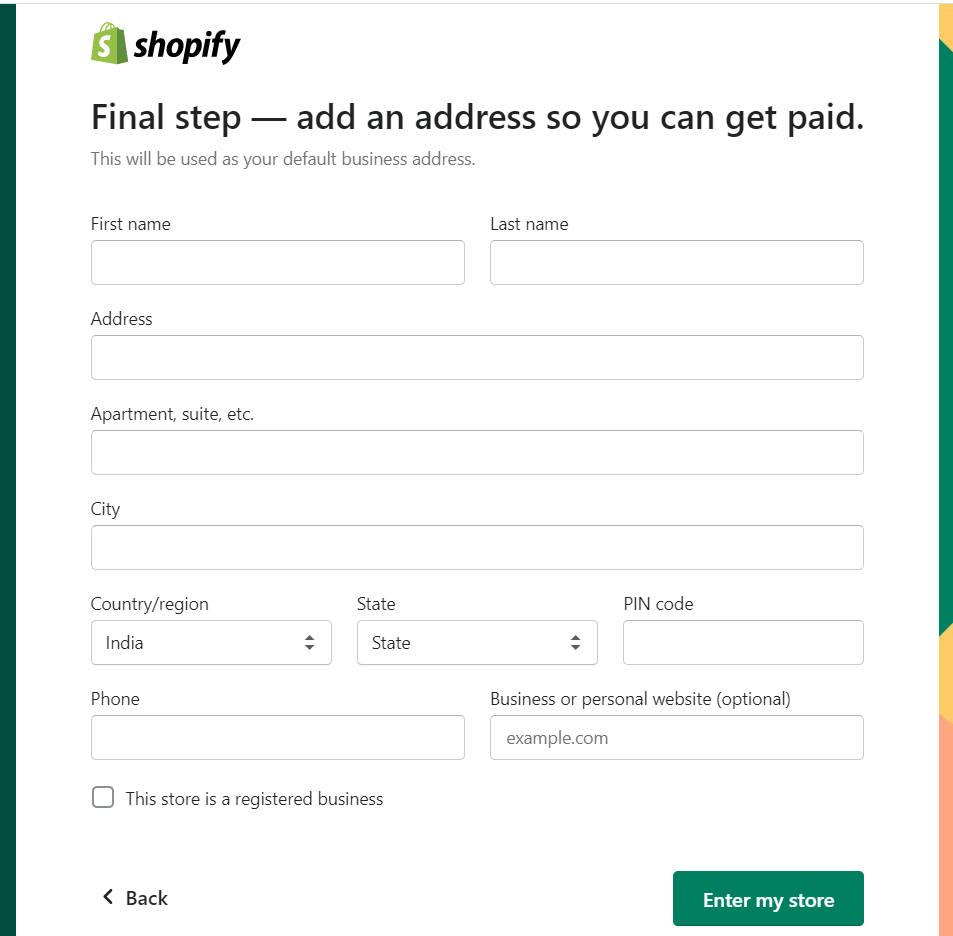
The next step asks you some simple questions to answer, like current revenue and your industry. You can simply answer these questions. On the final account creation process, it asks for your complete address to finish the setup.
Then you will be directed to your store. The default URL will be created with your store name and myshopify extension at the end.
For example – If your store name is MetalWatches, then your default URL will be like metalwatches.myshopify.com.
It is just a temporary URL, and you can change your URL by adding a custom domain later. So no problem with the store URL.
Once you properly provide your details, now you will be on the admin panel. This is the area where you will spend most of your time.
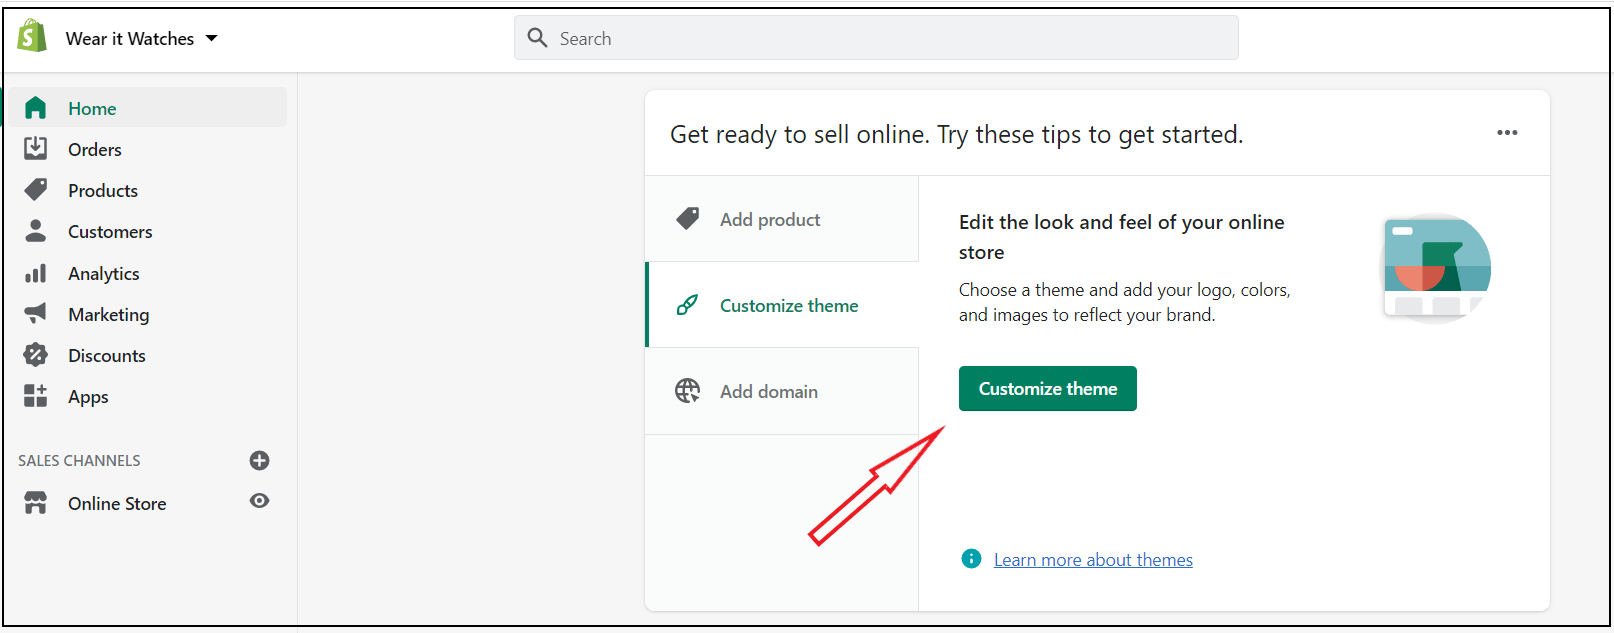
In the admin area, you will be shown up with the step-by-step process to add setup to your store. Select the customize theme option, and it takes you to the theme customization area.
Now choosing the premium theme is essential for every business. There are many free and paid themes available. But only premium themes are made with high quality and included with fully customizable demos and templates.
So consider buying a premium theme as the best investment for your successful online store. Boom is the best and top-rated Shopify theme that is very easy to customize which is recommended by many top professionals.

This Boom multipurpose theme is included with over 70+ demos and complete customizable layouts that are highly suitable for beginners to create a successful Shopify store.
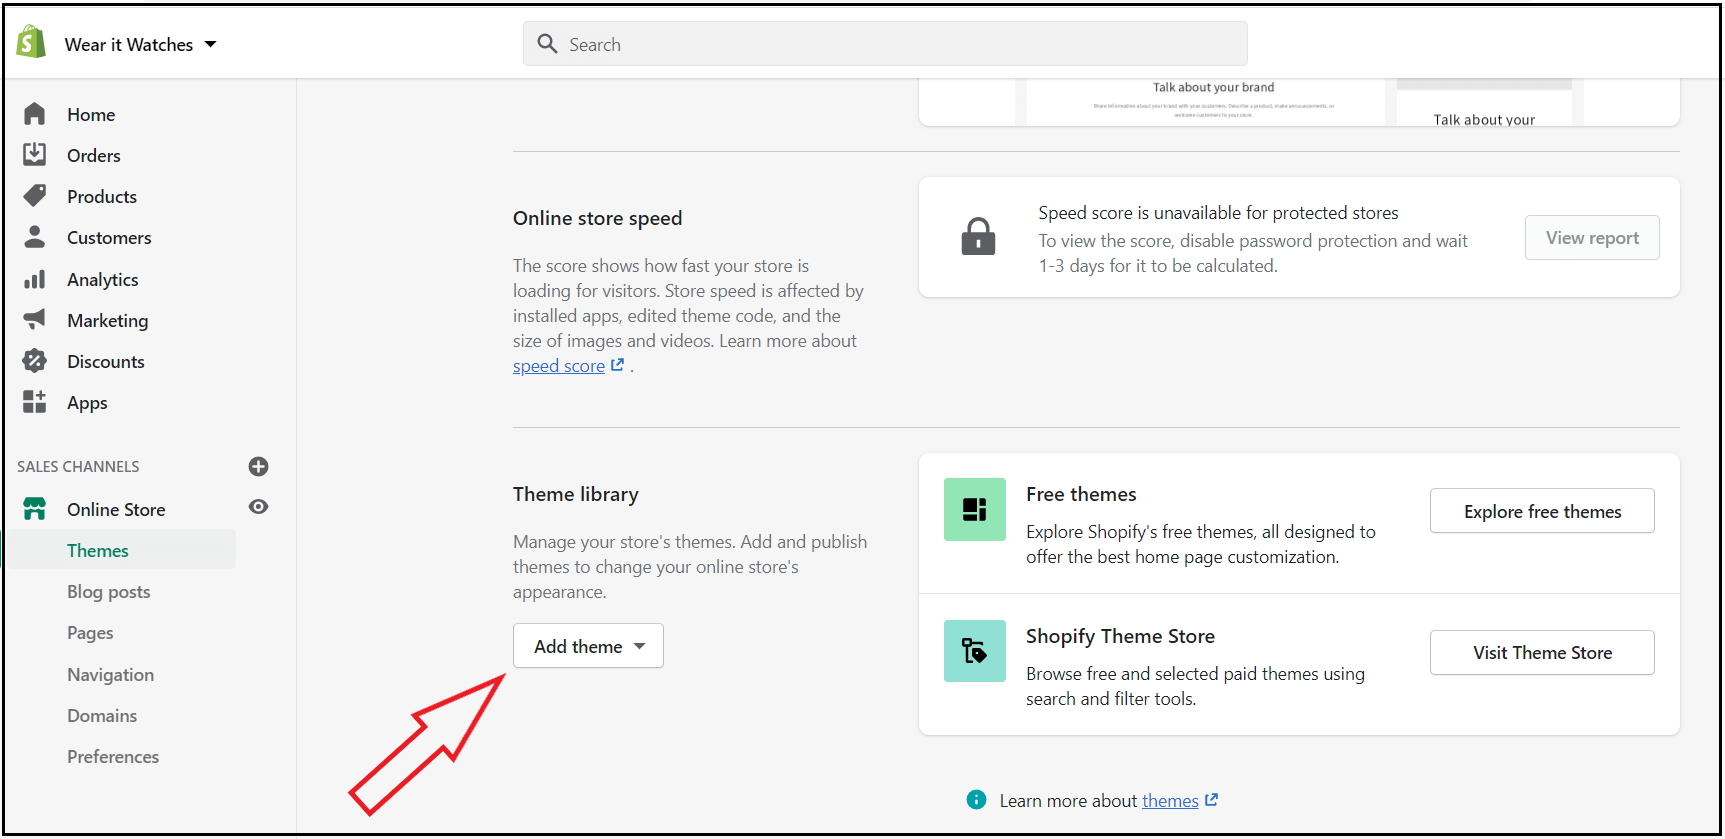
Once you have downloaded the theme, you can upload the theme ZIP file by adding a theme option.
I will always insist the Shopify store creators go with the premium theme. It is because they are designed with high quality. You will get regular updates and professional support.
So don’t go with the free themes if you want to establish a successful Shopify store.
Without knowing a single line of coding, you can design beautiful stores with this Boom theme. It also allows you to edit the HTML and CSS to customize stores creatively.
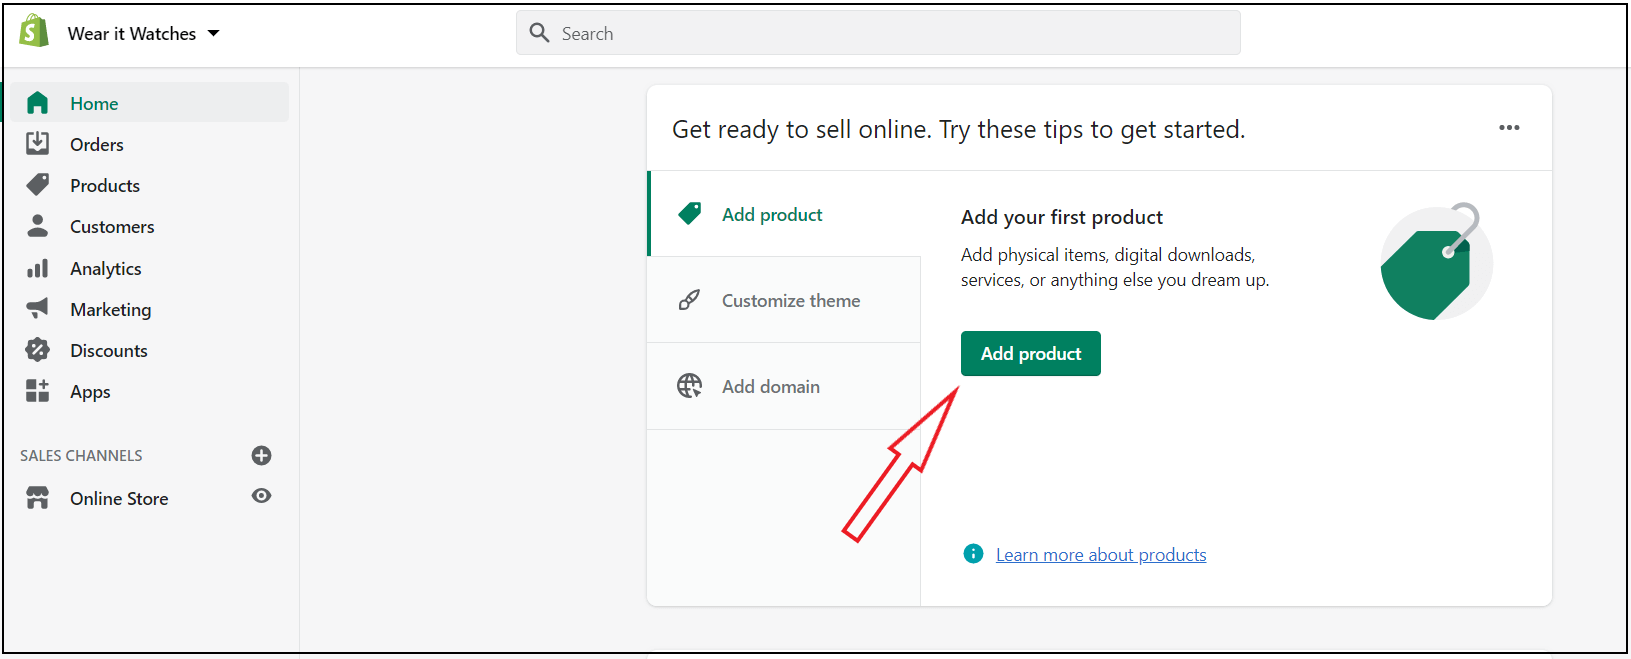
Now you can start to add products to your store. Navigate to the Products tab and click “Add Products.”
Once you click add products, it allows you to add the product details. It includes product title, description, pricing, media, available quantities, size, color, and many others.
Before creating your store, you should define the product you are going to sell. A better display of products will improve your product conversions.
Initially, don’t add more products to the store. Start with a small number of products and optimize it for better conversions and extend yours. You can also look at some of the best Shopify stores for better inspiration and ideas.
Product title is the thing people see when they browse the product. Add a short and crisp title to your product that exactly matches the intent.
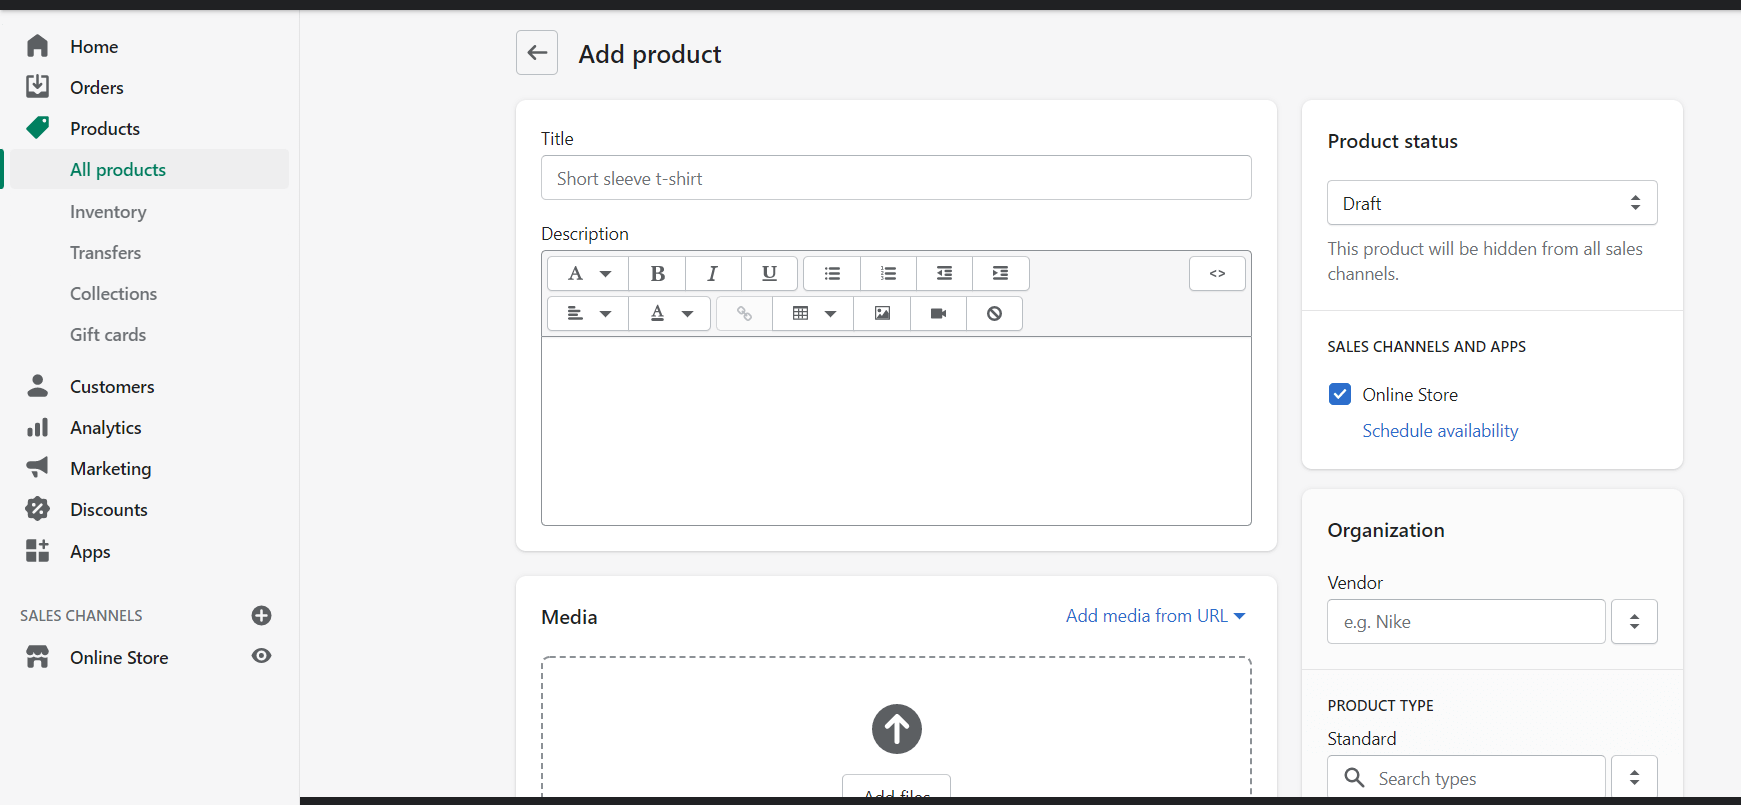
Next is writing product descriptions that include all the information and features that a person will find in the product. The product descriptions should be quick and easy to read. You can also use bullet points to present the product details effectively.
Then you can add the media related to that product to enhance the product visualization. Mostly try to add very appealing and pleasing images of your product. Either you can use images from other seller sites, stock images, or your images taken by yourself.
Make sure the product image is of high quality and not blurred or low quality. It’s because the visuals have a high impact on product conversion rates.
Next thing is to add a price for the product. Just add your competitive pricing, and you can easily change it whenever you need it. Then you can easily add the inventory, color, size, and other options.
Now you have successfully added your first product to the store. You can also make collections or groups with yours. On collections, you can organize a particular category product on a specific page.
A professional store always needs some important pages that help the visitors to understand your business and website. These pages will improve customer’s trust in your brand.
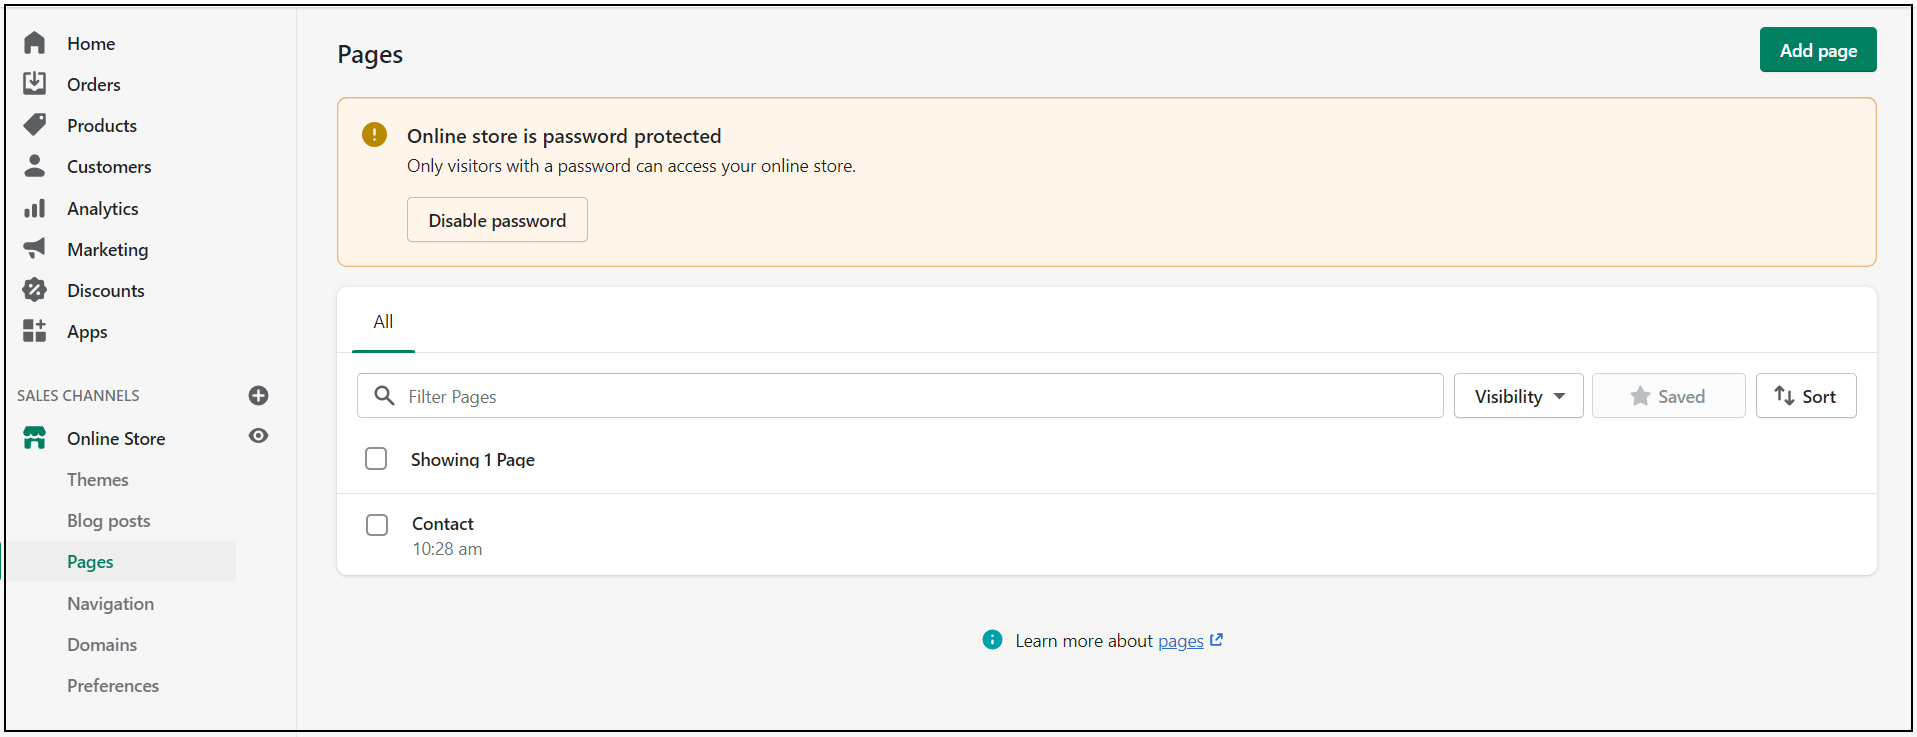
To create these essential pages, navigate to Online stores on the left side of the admin area and then to Pages.
You can easily set up a suitable payment method for customers to collect your money. Shopify comes up with multiple payment gateways to choose and select based on your needs. You can set these payment gateways by navigating to settings and Payments.
It typically has two payment gateways: Shopify payment and the other is a third-party payment gateway.
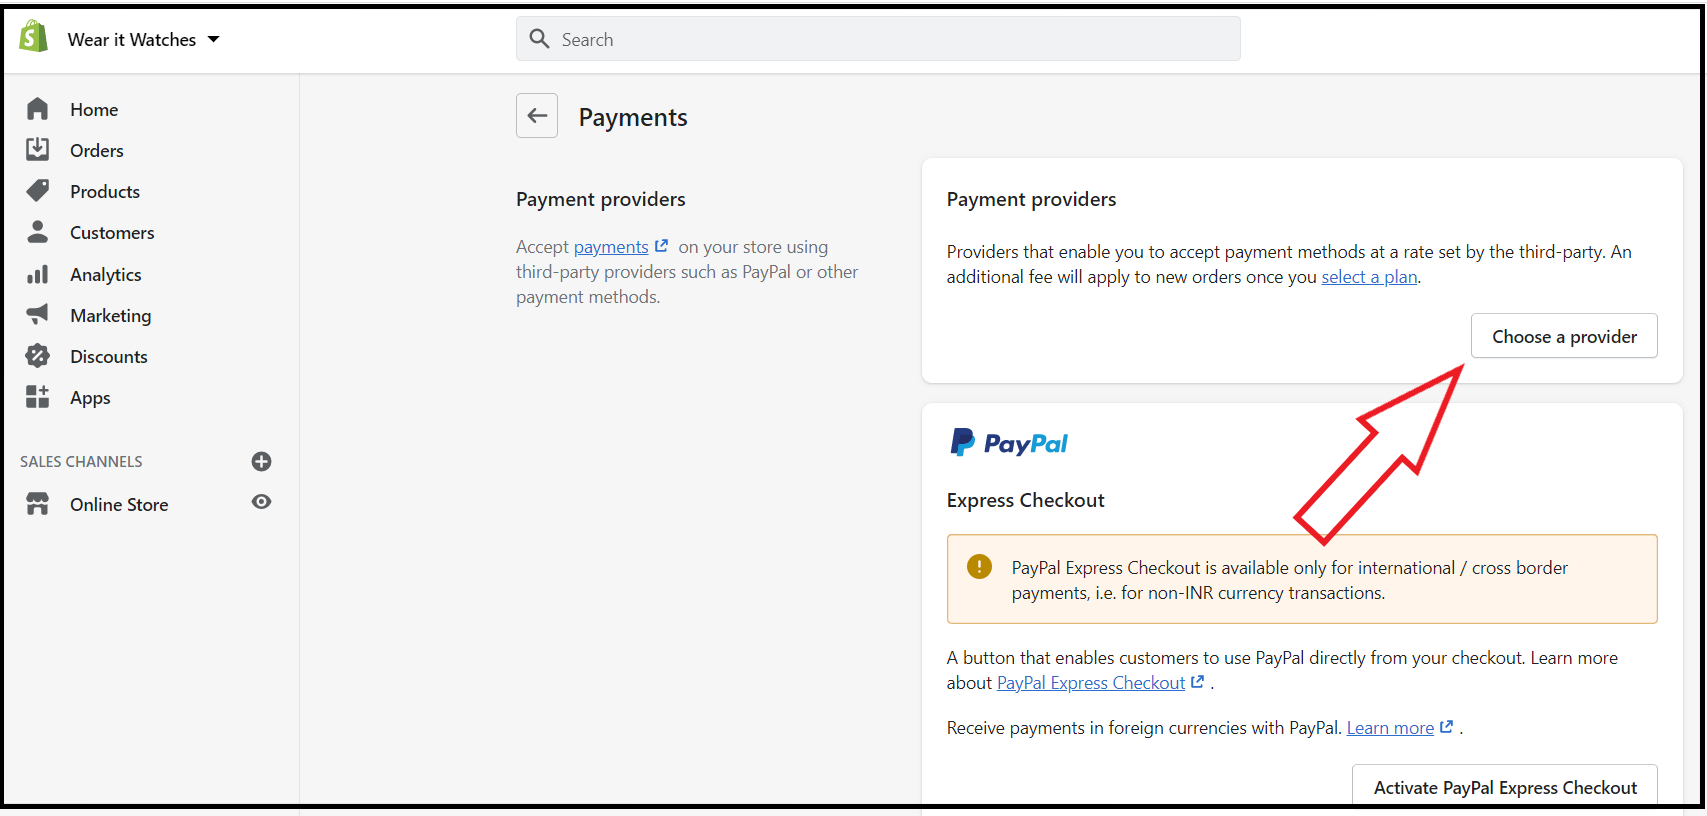
You can choose Shopify Payment if your business is in one of their supported countries, and you shouldn’t do any prohibited business in that country. On Shopify pay, you will get no extra transaction charges. But Shopify payment is only available for a limited number of countries. But you get PayPal as an additional payment gateway.
If you are not eligible in these countries, go with any of the 100+ available third-party payment gateways integrated with Shopify. It is essential to know the cards supported by the gateway and transaction charges of the payment gateway you choose.
Now you have finished setting up your payments and following on to shipping. Once the payment is made, choose how you are going to set up your shipping.
To set up shipping, navigate to Settings > Shipping and delivery.
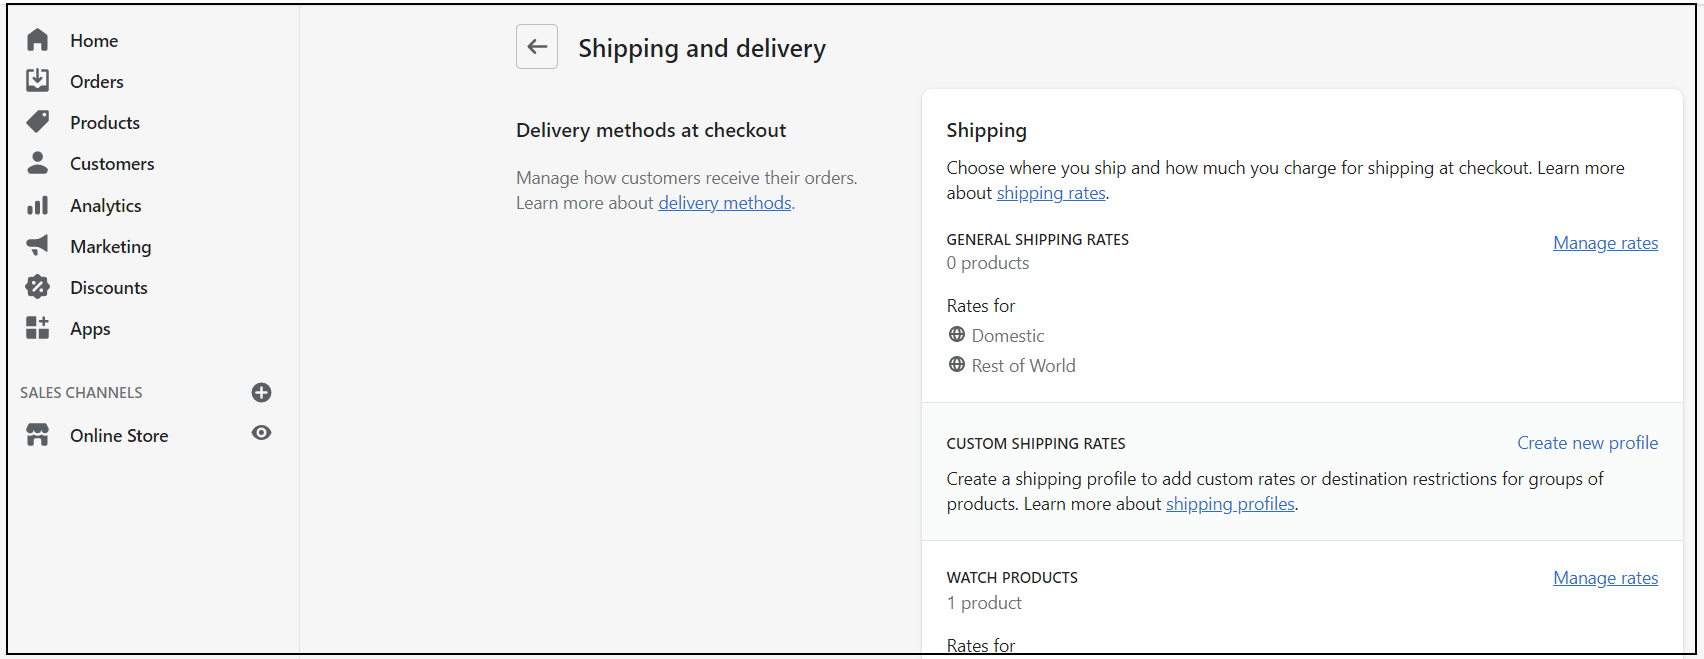
The shipping price may vary depending on multiple factors like shipping countries, carrier rates, product weight, packaging costs, and profits. So you can set your shipping costs based on your preference.
Shopify has four methods to calculate shipping rates.
With multiple shipping conditions and based on locations, you can customize your shipping methods much better.
Tax is one of the serious things to consider. To set up taxes, navigate to Taxes under the Settings tab on the left side of the admin panel. Shopify will automatically calculate the tax and collect based on your region.
But you also need to check the tax rates in your region and consult a tax professional.
Now you can add your custom domain name to make your website look much professional. You have two options to add your domain.
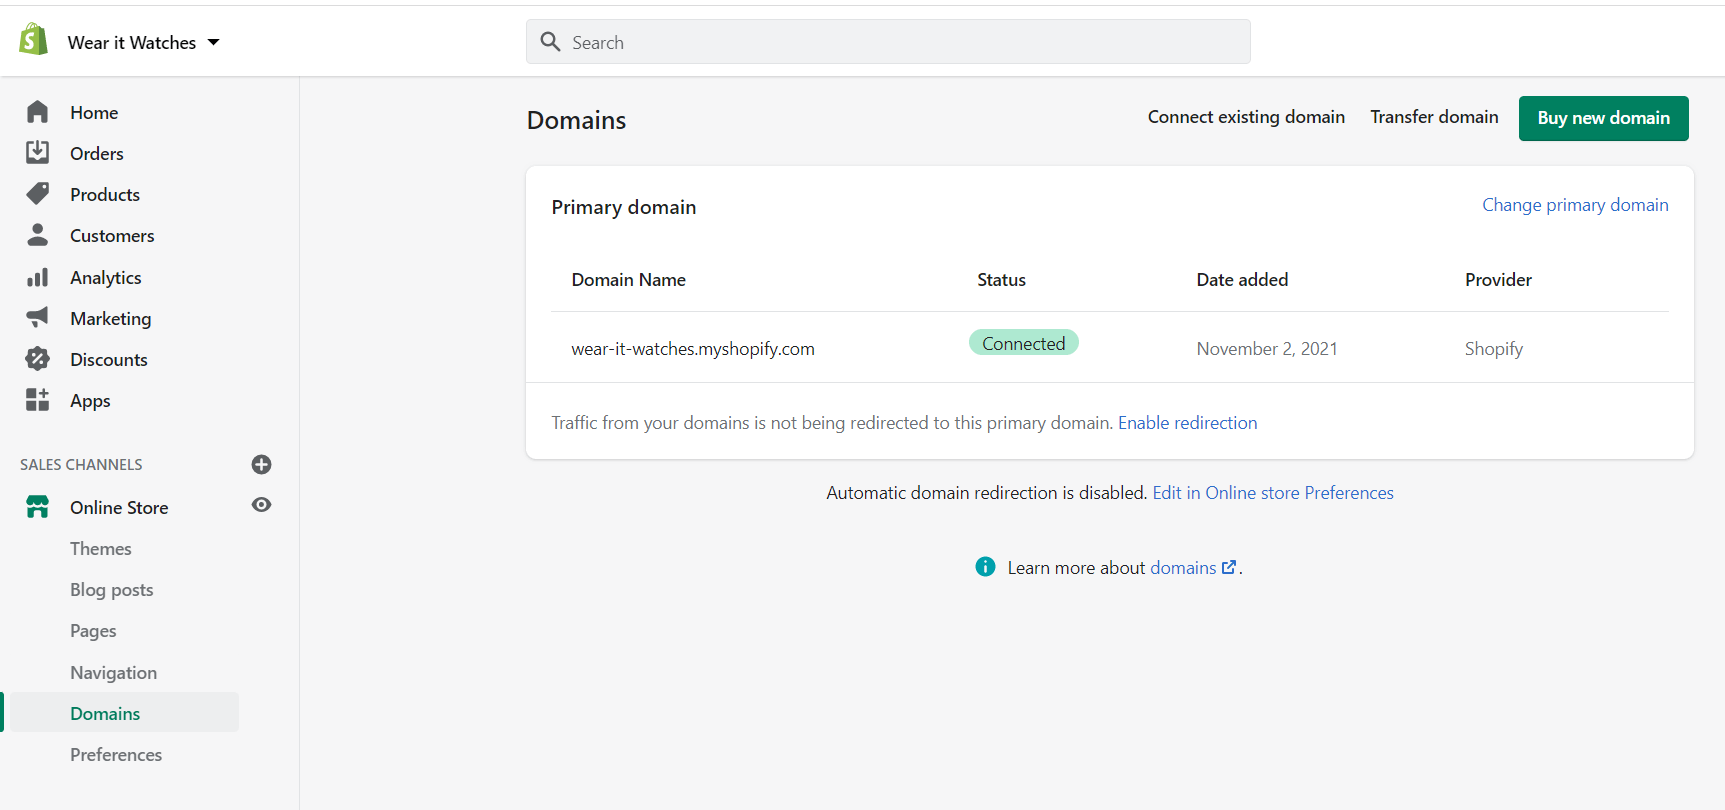
You can also easily buy a new domain name from Shopify, which you can connect easily. You can also buy a domain from other domain registrars and secure your domain to the store.
Shopify is included with a lot of options to customize your site altogether. You can also set up social channels, Google Analytics, Facebook Pixel, buy button, email notifications, and many others.
Then you can also play with the theme customization options, colors, typography to make it better. When launching, you don’t need to be everything perfect. Once you start and launch your store, you can learn on the way.
It is the final step to launch your complete professional online store. However, you could skip most of the above steps to launch the store, but this step-by-step process allows you to launch your website with all the necessary things to get customer attention.
To launch your store navigate to Online store and Preferences. Youranothermethod store is password protected on the free plan, and you purchase a plan to open the store to everyone.
With higher-level plans, you can save more on the transaction charges. Now you have created an online store, and it is the best way to create a Shopify store.
The dream of creating an eCommerce store is now easy, creative, and fun with Shopify.
Read Our Related Article:
For every type of business, a small amount of investment is needed to make it successful. When you start using a perfect Shopify theme like Boom will save you time, and it is highly customizable with a massive collection of inbuilt layouts and options.
Creating your online store doesn’t need huge investments and technical experience. You can easily create and set up your Shopify online store in 30 minutes by following these simple steps.
E-Commerce Themes Let us imagine our online stores like the colorful islands in the vast sea of the internet. The PrestaShop labels act like...
Responsive Design Imagine this: you’re browsing an online shop on your smartphone, eager to explore the state-of-the-art merchandise and make a purchase. You want...